The Bing redirect virus is actually a browser hijacker that takes over Chrome and forces your searches through Bing. It does this to collect your data, flood you with unwanted ads, and possibly install other malicious software. To get rid of it, remove any suspicious extensions, scan your PC with a reliable antivirus, and reset your browser settings.
If you’re constantly being redirected to Bing while trying to use Google, your browser might be infected with the Bing redirect virus. This unwanted program often sneaks in when you accidentally install a shady extension or download unsafe software from unreliable sources. But the problem doesn’t stop at search redirects – this hijacker can track your browsing habits, slow down your computer, and even expose sensitive data.
To stop Chrome from redirecting to Bing, you’ll need an effective antivirus and a proper reconfiguration of your browser settings. In this guide, I’ll walk you through every step to safely remove the Bing redirect virus from Chrome and keep your device protected in 2025.
Tired of the Bing redirect virus hijacking your Chrome search? While manual fixes help, they don’t always catch hidden threats. Choose Norton, the trusted antivirus built to detect and remove stubborn browser hijackers, safeguard your data, and restore smooth, secure browsing in 2025. It’s fast, easy, and worry-free.

Why does Google keep switching to Bing
If Chrome keeps switching from Google to Bing, it’s a major sign that your browser has been hijacked. The so‑called “Bing redirect virus” isn’t a virus in the traditional sense, but a browser hijacker that silently takes control of your search settings. Instead of letting you use Google, it forces Chrome to open Bing every time you search. These hijackers often sneak in through bundled software from free download sites, fake update pop-ups, shady browser extensions, or even misleading ads that look legitimate but aren’t.
Once installed, the hijacker tampers with Chrome’s core settings, including your default search engine, homepage, and new tab page. It might even block you from switching them back. For example, you might notice your homepage suddenly opens Bing, or Chrome automatically loads Bing even when you directly type “Google.com.” The goal behind these changes is simple – pushing unwanted ads, tracking what you do online, and profiting from your clicks. Understanding how this hijacker works is crucial for getting rid of it for good.
How to stop Bing from taking over Google
To stop Bing from taking over your Google searches, you need to remove the browser hijacker and restore Chrome’s settings. This is a multi-step process: change your default search engine, remove any suspicious extensions and apps, reset Chrome to its original settings, then run a full scan with a trusted antivirus tool. Each step matters because hijackers often hide in several places and can reappear if anything is left behind. By carefully completing all the steps from this guide, you can stop Chrome from redirecting to Bing and keep your browser safe and protected.
Step 1. Change the default search engine in Chrome
The first step to stop Bing from taking over your searches is to reset your default search engine in Chrome. Browser hijackers often change this setting to redirect everything through Bing, so restoring it puts you back in control. To do this, open Chrome Settings, scroll to Search Engine, then click Manage search engines and site search. Find Google in the list and set it as your default search engine. Next, look for Bing or any unfamiliar engines and click the three dots beside them to remove them completely.

If you use multiple Chrome profiles, repeat this process for each profile, as hijackers can modify them individually. Changing the search engine helps stop the immediate Bing redirects when you search or open a new tab, but it doesn’t remove the virus itself. The hijacker is still active in the background, capable of switching settings back or injecting new code. This is why you’ll need to continue through the next steps, where you’ll remove malicious extensions and scan for hidden files to eliminate the source of the problem entirely.
Step 2. Remove suspicious extensions and apps
Browser hijackers often come bundled with malicious extensions or software that secretly install themselves alongside legitimate programs. These add-ons can control your search behavior, alter browser settings, and even reinstall the Bing redirect after removal. To detect them, check for any unfamiliar extensions in Chrome, especially those you don’t remember installing or that appeared around the time the redirects started. Next, look through your computer’s list of applications for strange or recently added software with generic names or unknown publishers. Removing these unwanted programs reduces the chance of the hijacker reappearing later:
- Open the Control Panel from the Start menu.
- Click on Programs, then select Uninstall a program.
- Sort the list of programs by installation date.
- Carefully review recent entries and look for suspicious or unknown programs.
- Select any unwanted item and click Uninstall to remove it.
- Open Finder from the Dock or menu bar.
- Click Applications in the left sidebar to view all installed apps.
- Look through the list and identify any recently installed or unfamiliar programs.
- Drag any suspicious apps to the Trash.
- Right-click the Trash and select Empty Trash to permanently delete them.
Cleaning up extensions and software helps remove the sources that may keep Chrome redirecting to Bing. However, to ensure no hidden components remain, you’ll still need to reset your browser and run a complete antivirus scan in the next steps.
Step 3. Reset Chrome settings
Some browser hijackers are stubborn and keep reappearing even after you remove extensions or change your search engine. That’s because they modify Chrome’s internal settings and sometimes block your changes. Resetting Chrome is the most effective way to wipe out these hidden modifications. This process restores the browser to its default state (resetting your search engine, homepage, and new tab page) while keeping your bookmarks, saved passwords, and browsing history intact. It also disables all extensions, removing those potentially injected by the Bing redirect hijacker.
Here’s how to reset Chrome and set Google as your default search engine again:
1. Open Chrome Settings and click Reset settings on the sidebar.
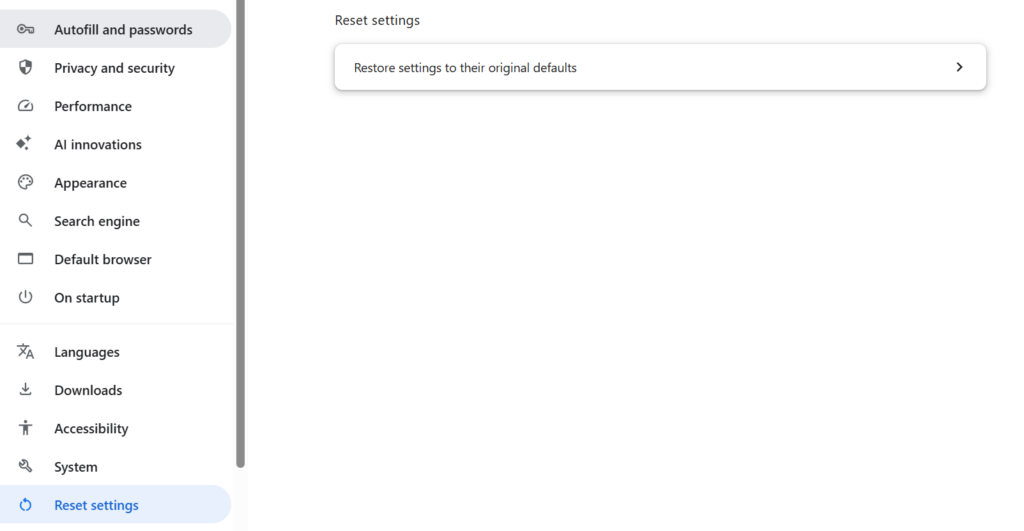
2. Select Restore settings to their original defaults, then confirm by clicking Reset settings.

3. Once the reset is complete, go to Settings -> Search Engine -> Manage search engines.
4. Choose Google as the default option and remove Bing or any unknown entries.
A reset ensures that any hidden scripts, extensions, or settings the hijacker changed are fully removed, giving you a fresh, clean start while preventing future redirections.
Step 4. Run a full system scan using a reputable antivirus program
Even after cleaning your browser, remnants of the Bing redirect hijacker can still hide deep in your system. That’s why running a full scan with a reputable antivirus program is essential. Antivirus software can detect and remove malicious programs, hidden scripts, and registry entries that manual steps might miss. This not only eliminates the Bing redirect for good but also strengthens your computer’s defenses against future malware or phishing attacks.
Norton is a strong choice because it offers real-time protection, advanced threat detection, and dedicated tools to remove browser hijackers automatically. Its scans are thorough yet lightweight, ensuring your device stays clean without slowing down.
Follow these steps to remove the hijacker with an antivirus:
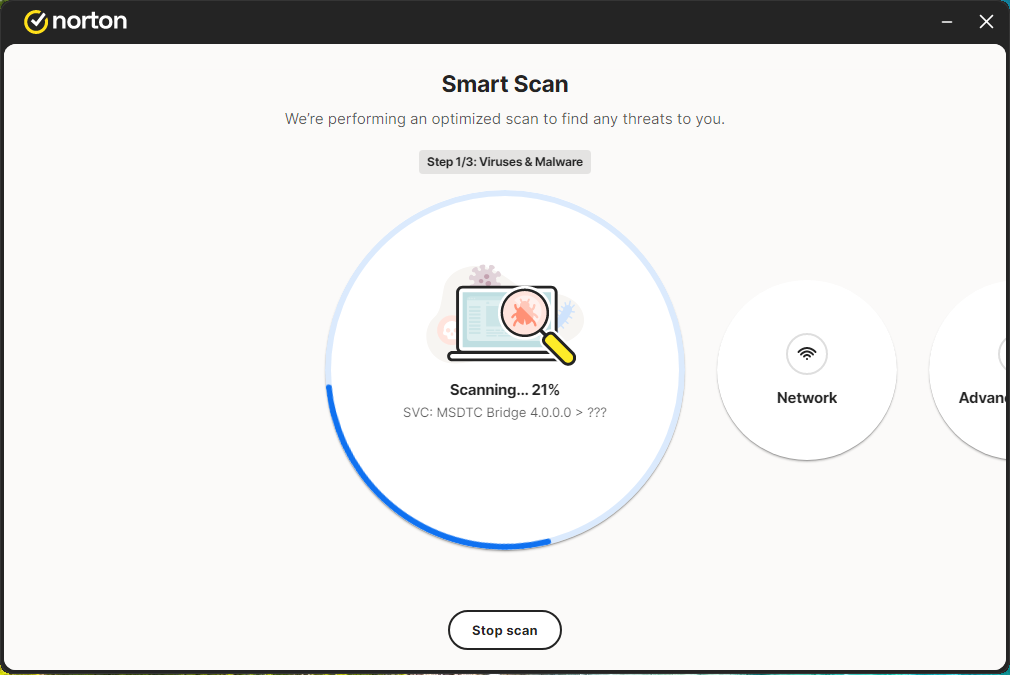
- Install and open a trusted antivirus program like Norton.
- Update the virus definitions to ensure you have the latest protection.
- Run a Full System Scan, allowing it to check all files and browser settings.
4. Quarantine or delete any flagged items.

5. Restart your computer and open Chrome to confirm the redirects are gone.
Running regular antivirus scans with a reliable AV software helps prevent future infections and keeps your browser secure and under your control.
How to protect your device from browser hijackers
Preventing browser hijackers is just as important as removing them. Once your Chrome browser is clean and stable, take a few proactive steps to keep it that way:
- Keep Chrome and your operating system up to date. Regular updates patch vulnerabilities that hijackers often exploit to slip into browsers unnoticed.
- Install extensions and apps only from trusted sources. Avoid add-ons with few reviews or unknown developers – they’re a common disguise for redirect malware.
- Be cautious with ads, pop-ups, and email links. Many redirection viruses spread through phishing emails or fake download prompts that look legitimate but can install hidden services, such as Google Lead Services malware.
- Run thorough antivirus scans regularly. Even careful users can accidentally download infected files. Scanning regularly with a reliable tool like Norton helps catch and remove threats before they take root.
- Practice safe browsing and downloads. Always review file origins, especially when using free software, as hijackers often bundle themselves with installers.
Each of these habits builds a stronger first line of defense. By keeping software updated, avoiding questionable downloads, and using trusted antivirus protection, you reduce the risk of future browser hijack attempts. Keep your online experience secure and stress-free.
Final thoughts
Dealing with the Bing redirect virus can be frustrating, but the good news is that it’s completely fixable. By carefully following the steps in this guide (changing your default search engine, removing suspicious extensions, resetting Chrome, and running a full system scan), you can stop unwanted redirects and regain full control of your browser.
Each step targets different parts of the hijacker, ensuring it’s wiped out entirely. For the best protection moving forward, use a trusted antivirus like Norton, which provides real-time threat detection and automatic removal of hidden browser hijackers. With these measures in place, your Chrome browser will stay clean, secure, and running smoothly, with no unexpected Bing takeovers – just safe and comfortable browsing.
Related articles:
- Best antivirus with VPN included
- Antivirus software versus a firewall
- Best antivirus for Windows 11
- Best antivirus for iPhone
- The best free antivirus software
FAQ
Bing usually opens when you start Chrome because a browser hijacker or unwanted extension has changed your default search engine and startup settings without your permission. This can happen after installing bundled software, clicking misleading ads, or adding shady extensions that silently modify Chrome’s configuration.
A Bing redirect virus is a browser hijacker that forces your searches through Bing, often via intermediate ad or tracking sites. It typically changes your homepage, default search engine, and new tab page, then injects extra ads and can log browsing data for profit.
To remove Bing from Chrome, change your default search engine back to Google, delete unknown search engines, and remove suspicious extensions. Then reset Chrome’s settings and run a full antivirus scan so any hidden scripts or files that keep restoring Bing are completely removed. I recommend scanning with a reliable and trusted antivirus like Norton.
To get rid of Bing redirect on Mac, delete unknown profiles, uninstall suspicious apps, and clean malicious browser extensions in Chrome, Safari, or Firefox. Afterwards, reset browser settings and scan your Mac with a reputable antivirus like Norton to eliminate remaining hijacker components and stop future redirects.